
There is no denying the tool belt’s advantages, such as storing and transporting mechanical equipment. You can select a useful tool belt among thousands of products out there. But have you ever thought of making a DIY tool belt?
With the right materials, it’s possible to craft pouches with stylish patterns to suit your taste. What’s more? You can add as many pockets as you want.
Let’s spend your weekend making a handcrafted tool belt. I bet that it will be a fun activity for family members.
Table of Contents
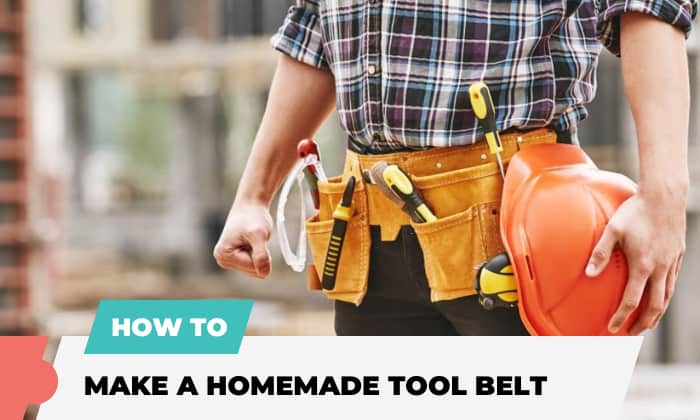
How to Make a Homemade Tool Belt
Option 1# Fabric belt
What to prepare
- Template
- Fabric
You can use new fabric for your DIY utility belt or take scrap pieces from jeans you no longer wear. In case you want to make a tool belt for child, it’s advisable to opt for a colorful pattern, making the DIY kids tool belt eye-catching.
- Belt or wide strapping/webbing
- Pins
- Rotary cutter/ fabric scissor
- Needles
- Fabric marker
- Threads
- Ruler/measuring tape
- Rivets (optional)
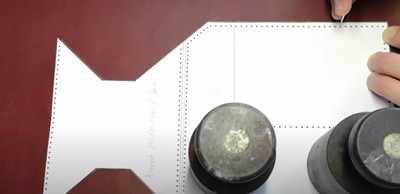
Step 1: Prepare the template and design your own tool belt
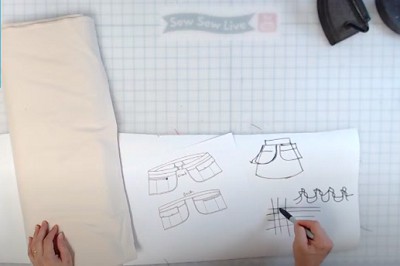
- Based on your preference, you can draw with markers or download a template for your desired construction. Etsy may be a good place to start your gardening tool belt template search.
- Separate the template into small pieces using scissors. Make sure you prepare enough pieces for the waist belt, pockets, and hammer strap.
Step 2: Cut the fabric
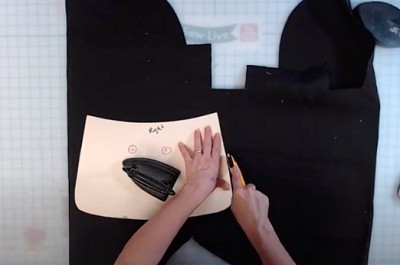
- Arrange template pieces on the fabric neatly; you can use tape to keep them in place. Then, contour cut along the edges exactly, and assemble the pieces together. This enables you to imagine fabric tool belts
- To prevent the fabric from tearing after wearing and washing it, I’d recommend folding the raw edges of the pieces over, then sewing them.
- If you want to recycle your old jeans, cut the upper part of the pants. Remove the front fabric from the cut piece. Don’t cut the waistband with a button, since it will be the belt, and the back pockets will be the tool holders.
Step 3: Sew pieces for the main pocket
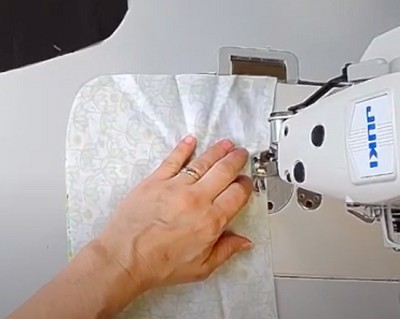
Sewing fabrics requires meticulous hands to create even stitches. To do that, you need to place the finishing side of the pieces facing each other. As a result, the side will be oriented identically.
- In order to stitch pockets without a hammer strap, leave ¼ inch from the edges of the fabric while stitching, then hem 3 edges. The top opening edge allows you to turn the pockets inside out and sew them close.
- For pouches with a hammer strap, follow the previous guide. I’d emphasize that from the top 2 inches of one corner, you’d leave a 3-inch opening for the strap and turn the pouch inside out. This mouth is for sewing the strap later.
Step 4: Sew hammer straps
Hammer straps are necessary to hold large tools such as drills and hammers. The hammer strap should be placed on your dominant hand side for more convenience.
- Prepare rectangle pieces with 7 x 3 inches dimensions. Fold them horizontally, then sew three edges as in step 3. Ensure the stitch is hidden before folding the short ends.
- Place the strap into the opening mouth of the hammer pocket you made earlier. Make sure the straps form an outside loop and sew them to the pockets several times for durability.
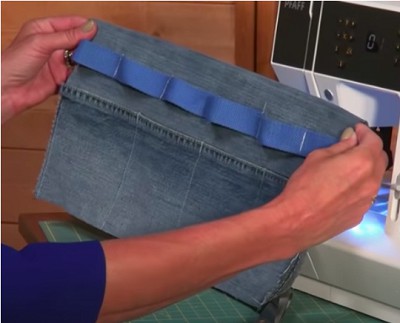
Step 5: Arrange pockets

- Fold and sew the top edges of all pockets over ½ inches on one side. After that, follow the same process for the bottom edges but fold them on the other side.
- Depending on your work, you need to arrange the small pockets on the bigger ones. Then, hem along the inside edges of the small pockets. If you want to create tubes, you can add vertical stitches to a pouch.
- Repeat the procedure to have more tool belt pieces.
Step 6: Waist belt
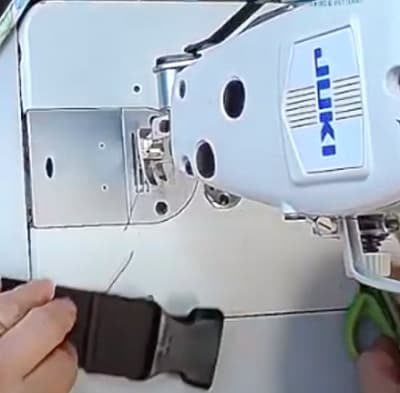
- Measure your waist and add 6 inches to the length before cutting your webbing.
- You need to run two ends of the webbing through two sides of a buckle with 2 ½ inches on each end. Fold each end over by ½ inches, then sew it several times to secure the buckle to the belt.
Step 7: Assemble everything
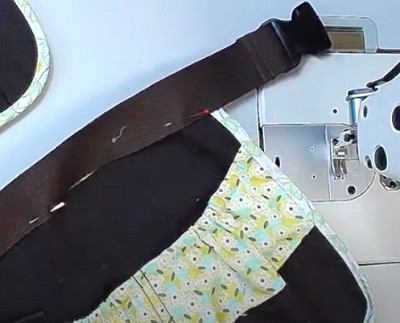
- Arrange and pin the top of the pockets to the belt, and ensure the hammer straps’ position is convenient for you.
- Hem the pockets to the belt with 2 lines of seam. Remember to be careful if you sew the 2nd line over the existing line. To increase the tool belt’s sturdiness, you can add rivets to the points of contact between the pouch corners and the belt.
Option 2# Leather tool belt
What to prepare
- Leather belt making tools: leather needles, hole punches, beeswax, ruler
- Glue
- Cow leather
- Template
- Scissors
- Chalk/marker
The procedure to make a leather utility belt is pretty much the same as making fabric belts. The biggest difference is the tool belt sewing pattern.
Step 1: Prepare leather pieces
- You can follow steps 1 and 2 in the fabric tool belt section to make leather pieces.
- It should be noted that you need to use hole punches to mark your leather seams. The ideal position of marks should be ⅛ inch from the edges and ¼ inch between holes.
Step 2: Sew leather
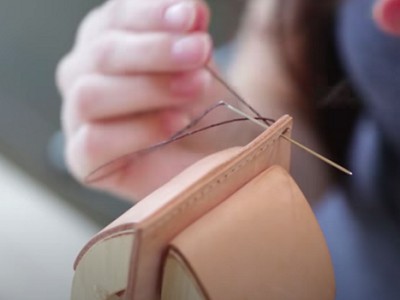
- Smoothen threads using beeswax and pass their ends through two needles.
- I’d suggest wetting the edges of the leather before sewing to avoid cracking it. In case you want to create tubes, you should scrape off the leather’s side edges a bit. Add glue to these parts and fold them before stitching for stability.
- Arrange leather pieces according to your desired template, then sew them using saddle stitches, which means the holes will be sewn twice from opposite directions.
Before stitching, two ends of the waxed threads need to be run through 2 needles.
Pass a needle through the first hole.
Take the left needle and run it through the 2nd hole. Then, use the right needle to stitch the same hole behind the left thread. Keep in mind to pull the thread away from you after each seam to tighten it.
Continue hemming until there is almost no thread left.
To finish the saddle stitch, run the threads through the last hole. Afterward, sew the leather like you did in the previous steps, except the direction is toward the first hole this time.
Ensure you make 2-3 tight backstitches for firmness. Then, stretch out the thread ends and cut them off.
- You can follow step 5 in the above section to arrange the leather tool belt pattern.
Step 3: Attach pockets to the belt
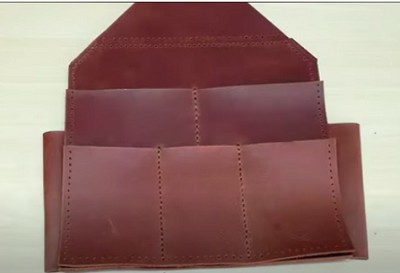
Now, all you need to do is follow steps 6 and 7 in the fabric section. Instead of hemming the pouches to the waist belt, I’d highly recommend going ahead with creating a loop on the top edge to thread the belt through it.
FAQs
What are the best materials to make a tool belt?
Tool belts can be made from various materials. Each of them has its own advantages and disadvantages.
- Synthetics include polyester and nylon. These are quite cheap and lightweight but aren’t the most durable. If you pick these materials, use multiple layers to increase sturdiness.
- Canvas is more long-lasting than synthetics due to its thickness. Its weight is also lighter than leather.
- Leather is thicker and heavier than other materials. That said, it is the most durable material. Although leather is quite pricey and requires regular maintenance, it is the best material to make a tool belt with.
Do I need suspenders for my tool belt?
The answer is yes, especially if you are slim and usually wear heavy tools. Firstly, a suspender keeps your belt in place and prevents it from sliding down.
Secondly, your waist and lower back have to withstand a lot of pressure while wearing a tool belt; the suspender helps distribute weight to your upper body, reducing the strain on your waist and lower back.
Last but not least, suspenders look great, and the combination of jeans and suspenders is not unfashionable.
Conclusion
There are thousands of DIY tool belt ideas online. Each of them requires different templates; however, the sewing method for fabric and leather should be followed as in the above comprehensive guide.
Hopefully, you can complete this DIY project successfully. Don’t forget to share your finished products in the comment.

This is Edward Manning, the editor in chief of Construction Informer. Quite a bit of my time is spent researching the market and interviewing experts in the field so that I can give you reliable information.