
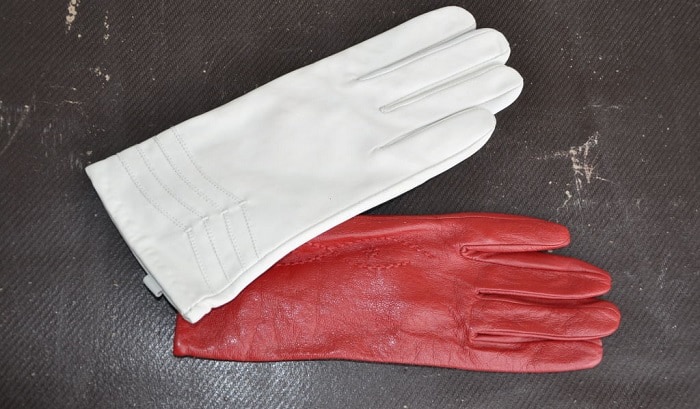
The reasons we dye our leather gloves are many, from restoring an old pair’s look to trying a new color that suits our preference. In truth, leather is a resilient fabric with long-lasting attributes, yet its look cannot keep up with such durability.
After a while of use, the tiny scratches and wrinkles make the pair not as appealing as before, especially the bright-colored one. Therefore, many wearers attempt to change the glove look by dyeing in a trouble-free and smooth DIY task. If you are here for it, check out our guide on how to dye leather gloves.
Table of Contents
Dye Leather Gloves With Commercial Leather Dye
What to prepare
- A suitable commercial leather dye: Among numerous products available, water-based agents are the recommended choice with their formula that makes leather surfaces soft and supple after application. Besides, water-based paints act as a coating, thus being able to change the glove color completely.
- Meanwhile, alcohol-based leather dyes are going to make the fabric a bit stiff.
- Color is among the criteria that we consider when selecting dye products. You should ask for a sample to test how the color turns out on the leather surface first since it is not always true to the advertised hue.
- One more thing, you need to choose between different application types. I always prefer spraying bottles, but some users would instead paint or sponge the colors.
- A leather deglazer: For thorough cleaning before dyeing, we should choose a good leather deglazer to smoothen the surface.
- A spray bottle of clean water (optional)
- Masking tape (optional): Masking tape is for covering the areas you do not want to dye. It also works well if you’re going to paint different colors for one pair of gloves.
- A pair of protective gloves: Rubber or latex gloves made for single-use are suitable in this situation. It can protect your skin from paint exposure and stubborn
- A mask: If you do not like the smell of leather dye, especially from alcohol-based ones, it’s better to put on a mask and work in an open area.
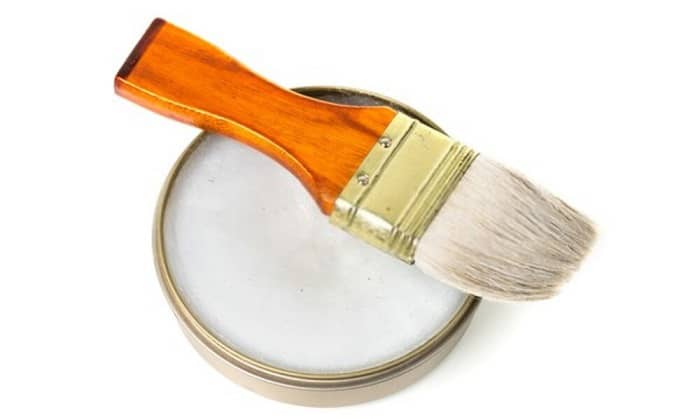
- A paint brush: Despite different applications, a paintbrush is advisable to make the paint layer smooth and even.
- Clean cloth: These pieces are for preparing the leather surface and tidying your work later, making sure the dyed leather is neat.
What to do
Step 1: (optional) Tape the areas you do not want to dye. This step is only required if you’re going to redo parts of the gloves and not the entire pair. But I recommend you work through the whole piece to ensure a smooth look.
Step 2: Wear protective gloves and mask. Make sure you arrange your stuff neatly in front of you to get ready. Then, wear gloves and a mask to protect from odor and paint spray.
Step 3: Prepare the leather surface. It’s time to rub the leather deglazer on your glove surface using a clean cloth. This step removes the finish and smoothens the surface so the dye can stick better and longer.
Step 4: (optional) Wet the gloves. We can bring out the water spray bottle for this step, ensuring our gloves are damp enough for dye absorbent yet not soaked in water. If the leather dye you choose does not require this step, then you can skip it.
Step 5: Start dyeing leather gloves. We can spray the dye or paint it, depending on the leather dye chosen for this task. You can follow the instructions on the product, which allow you to apply evenly.
For instance, sponges should be moved in a circular motion for a unique texture. Meanwhile, spraying allows for better blends and multiple layers.
Step 6: Add more dye layers. After waiting for the first coat to dry a bit, we can apply one or more layers to bring out the best color. It’s recommended we use the soft brush and move consistently.
Step 7: Allow the gloves to dry. You should leave the pair to dry naturally without excessive heat or direct sun rays.
Step 8: Buff the finish. To complete the process nicely, we can use a clean cloth to remove any ugly residues left on the surface. Now, it will reveal a smooth and rather shiny new color for us to enjoy.
Dye Leather Gloves With Milk Oil
Please know that this method is only for darkening your leather gloves, which turn a bright-colored yet chipped pair into a dark and smooth one.
What to prepare
- Mink oil: You should read product reviews carefully to choose one for your gloves. Mink oil works wonders to protect leather pairs from elements, but it can damage the fabric if not compatible.
- Clean pieces of clothes
- A bowl of hot water
What to do
Step 1: Clean the gloves. You can use a piece of clean cloth, dampen it, then rub it on the glove surface to remove dirt and dust.
Step 2: Warm the gloves. You can place it out in the open, under a bit of sunlight to warm it up. But please do not leave it there for too long to avoid damaging the leather fabric.
Step 3: Warm up the mink oil. Now, put the milk oil bottle into your prepared bowl of hot water to warm it up.
Step 4: Dye the leather with heated mink oil. We should apply the milk oil with a piece of a clean, soft cloth. Spread the oil all over the gloves, ensuring all surfaces are covered with several thin layers.
Step 5: Let the oil dry for 30 – 60 minutes. In this step, we leave the gloves in a well-ventilated area for them to dry gradually. Make sure you avoid direct sunlight this time.
Step 6: Buff the finish. With a clean cloth, we can polish the leather surface after dyeing. It is easy to rub the cloth in a circle, trying to eliminate any uneven parts or residues.
Pro tips: Or, you can even dye your leather gloves with shoe polish; watch this video to see how the process pans out:
Conclusion
As our guide on how to dye leather gloves reaches the end, hopefully, you already visualize the process you want in mind. Now, just with the right tools and methods, you can dye your old pair and revive a cool and beautiful look in no time.
The process is not so challenging or expensive, as long as you follow the instructions. We are excited to hear about your successful project via our contact page.
Feel free to share the article with those that need it. Thank you!

This is Edward Manning, the editor in chief of Construction Informer. Quite a bit of my time is spent researching the market and interviewing experts in the field so that I can give you reliable information.