
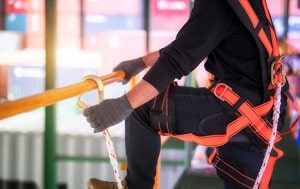
Not wearing a safety harness is one of the most common reasons for causing serious injuries, whether you work at low heights or on a roof.
That’s why OSHA requires you to use a safety harness and lanyard since it will keep you from high-risk situations: avoid hitting rocks or construction, allow you to land securely, and prevent you from accessing dangerous areas.
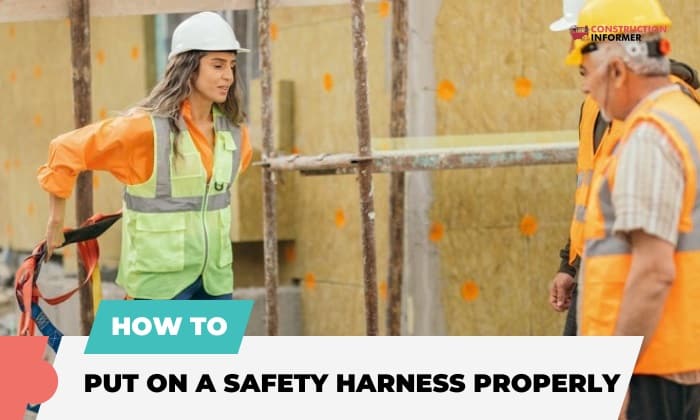
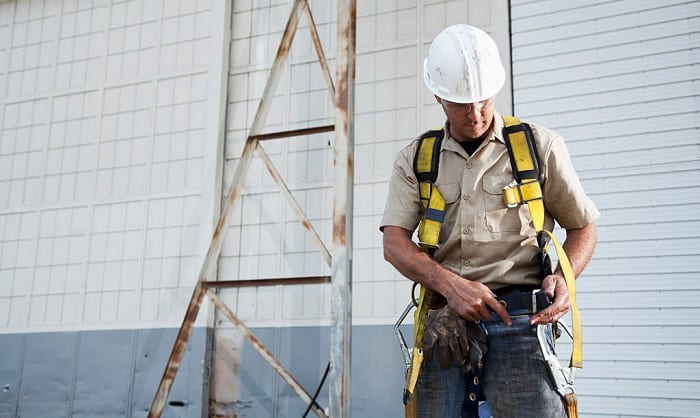
Learning how to put on a safety harness properly only takes some minutes but the secure device can save your life.
We place the steps in the correct order to properly put the harness on, you just need to do the same to benefit from this tool.
Table of Contents
- Step-by-step to Put on a Safety Harness Properly
- Step 1: Lift the dorsal D-ring
- Step 2: Disconnect components
- Step 3: Inspect parts of a safety harness
- Step 4: Wear a security harness on the shoulders
- Step 5: Buckle the chest belt
- Step 6: Attach the leg straps and waist straps
- Step 7: Fit the safety harness gear
- Step 8: Insert into the lanyard and anchor points
- Inspection of the Safety Harness
- Conclusion
Step-by-step to Put on a Safety Harness Properly
Step 1: Lift the dorsal D-ring
Don’t hurry to wear harness fashion or hold the dorsal D-ring, you ought to read manufacturer instructions or refer to safety harness training pdf first
There are several D-rings on a harness, making you confused. But, you only need to focus on the dorsal D-ring located in the middle of the back and lift it up vertically, which helps you recognize the positions of the harness’s accessories.
Step 2: Disconnect components
Start by wagging the harness to fall webbing downward. For extremely tangled straps, you can spread the equipment and separate it with your hands.
Then, unfasten the buckles and loosen the webbings by pulling their ends. You should ensure the components are in the same direction, then the inspection process is easier.
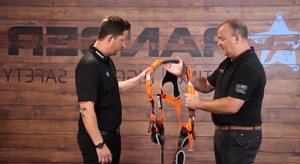
Step 3: Inspect parts of a safety harness
Before you wear safety harness, you can’t neglect to inspect it. You have to ensure your work harness meets all the following inspection requirements.
- The straps are robust without any tearing, cut, or worn-out signs since the sharp hardware may cut the webbings that threaten your security.
- Check the buckles, D-rings, plastic loops, and rivets to see if they are damaged, deformed, or missed. Don’t forget to check the grommets as they need to be attached to the straps securely.
- Run your fingertips along with every detail of the harness to find issues that eyes might not notice.
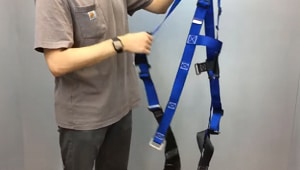
Step 4: Wear a security harness on the shoulders
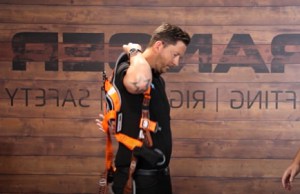
After inspecting the harness what is the first step in putting it on? The answer is to wear it on your shoulders.
- Putting on a harness on the shoulders is the same way you wear a jacket or suspenders.
- Modify the dorsal D-ring location to be placed in the middle of your shoulders, not too low or too high for easy access, then glide up and down to adjust the harness. The D-ring should be compatible with the lanyard to suspend you uprightly.
Step 5: Buckle the chest belt
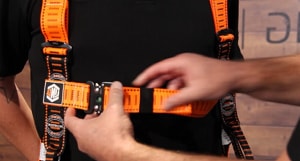
Once you don the shoulder straps correctly, the chest strap will be open in front of you. This strap should be arranged at mid-chest height after you connect the buckles. Modify the webbings to get rid of slack if needed.
Recheck the shoulder and chest straps as long as they embrace your body snugly if you face a head-first fall. The loose strap can promote danger for you.
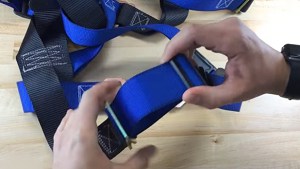
Step 6: Attach the leg straps and waist straps
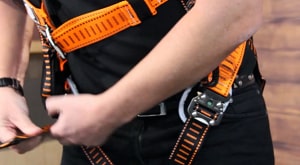
Arrange the harness position between your legs, pull the webbings, and fasten the buckles properly. Each fall protection body harness is equipped with different types of buckles and requires specific connections.
- Tongue buckles: Let the webbings run through the clasp and attach the prong through the grommet.
- Aass-style buckles: There are 2 pieces of buckles called male and female. The male is adjustable, and the female is fixed on the strap. You need to thread the male clasp through the female one and adjust it by pulling the strap’s end.
- Parachute buckles: They have 2 parts: with-roller and without-roller. Thread the strap up through the inside slot of the roller piece and run it down through the outside slot. The length of the free-end webbings should be at least 3 inches for firm performance.
- Quick connect buckles: Connect the buckle mouth to the receptor, when you hear a click sound, the buckle is inserted correctly.
In case your fall protection harness has waist straps, you can follow the methods used to connect leg straps to fasten them.
Step 7: Fit the safety harness gear
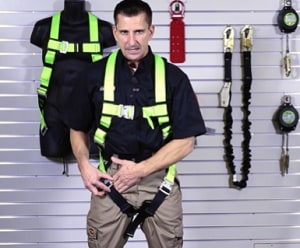
If you find the straps slack, you can tighten them and vice versa to hold your body appropriately.
The leg webbings shouldn’t be too tight for easy movements. Place your hand between the thighs and the straps, then glide it if you cannot slide your hands which is not a correct way to apply to wear leg straps.
To prevent awkward situations, insert the excess ends into the retainers or any loops.
For a visual harness wearing inspection, you can get a friend to check or use a mirror to scan hard-to-see parts.
Step 8: Insert into the lanyard and anchor points
- After the inspection process is done, you will attach the safety harness to the lanyard. We’d recommend you check the distance between the anchor points to your work area to determine the type of lanyard you use, which is self-retracting or shock-absorbing.
- For those who wear this PPF for hunting, you should tie off a safety harness to a tree at a level higher than your head to give you a full range of movements.
- Bear in mind to check the heaviest weight the anchor point can support, including your weight, tools, and equipment weight, before installing the harness to the point. When you fall, the force and the speed the harness suffers from are really large.
Inspection of the Safety Harness
Using the harness for construction workers or those who work on towering heights is significant. Even when you own this equipment, some may consider “when should fall protection equipment be inspected”.
The robust answer is before each time you use it and here is the inspection checklist you can refer to.
- Webbings
- Hardware: buckles, D-rings, back pads, and keepers
- Stitching
- Tag system
A useful tip is you can spread the harness on the floor for dog to discover strange signs on your equipment, like the way he sniffs his harness.
Conclusion
Once learning how to put on a safety harness is done, inspecting and wearing the harness becomes a piece of cake. A tip is to check the manufacturer guidelines to get specific details about inspecting, using, and maintaining the harness properly.
Besides checking the harness’s appearance, your feeling when wearing this equipment is also critical. The straps should embrace you snugly and give you a comfortable feeling when moving around. Hope you all always be safe in the PPE.

This is Edward Manning, the editor in chief of Construction Informer. Quite a bit of my time is spent researching the market and interviewing experts in the field so that I can give you reliable information.