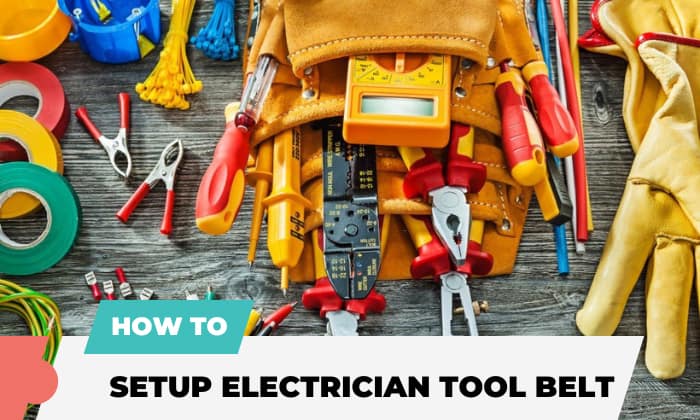
There is no fixed rule for electrician tool belt setup, as you can organize tools based on your taste and the nature of your work. Indeed, a wisely-arranged electrician tool bag can significantly increase productivity and safety.
Tool belts play as an additional hand to carry stuff. You don’t need to spend too much time looking for tools as things are always kept at your fingertips, even while working in high places.
Considering its importance, we’ll walk you through several organization tips for how to setup electrician tool belt to inherit tool belts’ benefits.
Step-by-step to Setup Electrician Tool Belt
What to prepare:
- Pockets with multiple sizes
- Sturdy tool belt
- An electrician tool set
- A suspender
Step 1: Choose a sturdy belt with different-sized pouches
Your priority is to find a sturdy tool belt. For instance, Klein tools, CLC, Makita electrician tool belt are worthy brands to check out.
- You should get one with a padded waistband to protect your lower back and support the tools’ weight.
- Tool belts featuring various-sized pockets and loops are excellent for transporting electrician equipment. The ideal numbers of pockets are 10-15, but if you are looking for more storage, the Toughbuilt tool belt can offer you 36 pockets and loops. A tool belt with up to 20 holders is enough for a drywall pouch setup.
- Wearing a waistband with two side pockets allows you to carry various electrician tool sets for different tasks. Based on your preference, you can wear side pockets higher or lower than your hips.
Step 2: Store major tools on dominant-hand
The dominant hand allows you to do fine motor tasks precisely. In case you are left-handed, the right hand is non-dominant, and vice versa.
1. The best way to organize duty belt is to store weighty and most used tools on the dominant side since it offers you more strength to carry heavy stuff.
2. You can keep quickly accessible stuff, including screwdrivers, strippers, diagonal cutting, pliers, and more, in outside hammer straps, hooks, and pockets. The flexible loops allow you to pick and leave tools easily.
3. The inside tool belt organization is for small items such as needle noses, hot pens, etc.
Step 3: Keep lesser-used tools on the secondary side
Make sure you carry less used and lightweight stuff on your secondary side, like markers, nail sets, and others.
Non-dominant side pockets should come with a lid or cover to ensure the screws and wire nuts don’t go missing while you are working.
Step 4: Add/remove or switch pockets
A tip to organize a tool bag wisely is that if you cannot remove pouches, you can switch the belt from the front or side to the back while working.
If your tool pockets are removable, you can detach unnecessary ones to reduce weight and tension for your hip. Otherwise, you can re-attach them to convenient positions to eliminate barriers when climbing high places or bending over.
Step 5: Wear suspenders for weight support
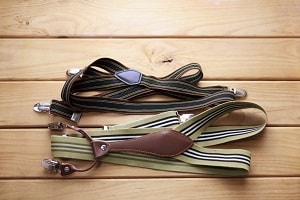
Your hip will suffer from a lot of tension when wearing a tool belt only. A suspender comes to rescue your body and prevent the waistband from falling down. It will distribute weight more evenly to your upper body part, including the back and shoulder resulting in tension on the hip and the lower body part being relieved.
As a result, no matter which organization ideas you opt for, we’d highly recommend you put on suspenders. Note that your waistband has to be designed with some buckets for suspender attachment.
Frequently Asked Questions
What do electricians carry in the tool belt?
An electrician tool pouch setup requires various equipment, you can refer below list for your reference.
- A knife for stripping cables with backup blades
- Diagonal cutters with angle or straight head
- Screwdriverbits and different-sized screwdrivers
- Pliers including lineman’s pliers, needle-nose pliers, and others
- Stripers and crimpers
- A level
- Open-end wrenches
- Drill
- Tape measures and adhesive tapes
- Electrical testers
- Pencils
- Chalk lines
What shouldn’t do with an electrician tool belt?
There are some notes you shouldn’t do with an electrician belt to extend its longevity and protect your health.
- Don’t select a narrow waistband since it cannot offer you the features of a lifting belt. Instead of that, pick the padded waistband to provide you comfort and ergonomics. It’ll help to reduce strains on your hip and prevent the waistband from digging into your skin.
- Don’t select the waistband without different sets of holes along the length. The adjustable waistband makes it embrace your waist snugly.
- Nylon, leather, or a combination of nylon and leather are stable and long-lasting materials. That said, you shouldn’t select other substances.
- Don’t try to carry all electrician tools at the same time. You should check the tasks you plan to do and prepare the utmost important stuff for those. You should prioritize storing lightweight stuff in the tool pouches.
- Don’t bring along any equipment while climbing to avoid accidents. Keep additional tools in a tool bag, gang box, or others to keep your hands free and reduce tension on your hip as well.
- Sharp equipment may injure you. Instead of keeping them in outside pockets, you can store them in the inside hooks with sharp blades side downwards.
- Leaving your belt and tool dirty will ruin it over time. Ensure to clean them after using them.
Conclusion
Answering the question of how to setup electrician tool belt isn’t a challenge for you anymore. You can apply different electrician organization ideas as long as they suit your work.
It should be highlighted that you just need to carry enough equipment for tasks to avoid overloading yourself.
We are really excited to see your setup styles, so let’s leave pictures in the chat box. If you have any questions, don’t be shy to type some words, we are always ready to answer.

This is Edward Manning, the editor in chief of Construction Informer. Quite a bit of my time is spent researching the market and interviewing experts in the field so that I can give you reliable information.


