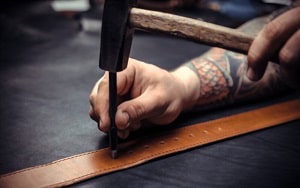
After enjoying tasty meals, you will probably gain weight. Aside from shopping pants in larger sizes, you may need to make an extra hole in a belt as well. However, you aren’t a tailor, so you don’t have professional leather hole punch sets.
Luckily, we’ll show you how to make a hole in a leather belt at home with a few available tools. You can save a bulk of money instead of buying a new belt. Now, let’s get started!
Table of Contents
Ways to Make a Hole in a Leather Belt
What to prepare
- A ruler/measure tape
- Marker pen
- Painter’s tape (optional)
- 2-inch wooden block in thickness
For the hole, choose one of the following:
- A powder drill with a brad-pointed or smooth bit
- A hand drill
- A rotary leather punch
- An awl/nail/ screwdriver
- A hammer/mallet
- A pocket knife
- A plier and nail
- A round drive punch
- Razor blade, screw, nuts, and hammer
- A leather polisher
Step 1: Measure the holes
Before you punch hole in belt, mark the locations for the holes, which should be an inch apart. If your belt width is below ⅜ inch, the interval should be ½ inch. For belt width over 1 inch, the gap is up to 1 ⅛ inches. Significantly, the holes’ center has to be in one straight line.
Use a marker to mark the holes’ positions directly on the belt. In case you don’t want to leave any ink spots, you can spread painter’s tape on the belt before dotting. After puncturing the holes, you can remove the tape easily.
Step 2: Make a new hole in a belt
You can try different ways to make hole in belt without punch or with a punch. Note that the holes will have rounded interior edges to prevent them from being torn. Fortunately, the below tools will do that well.
Moreover, based on your belt sizes, you can refer to the following hole diameters and opt for the proper one:
- Small: 5/32 inches (4mm)
- Medium: 13/64 inches (5mm)
- Large: 15/64 inches (6mm)
Then choose one of the tools below.
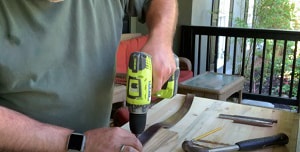
1. A power drill
- Before drilling, test drill bits until you find out the most suitable size for your belt. You can choose bits ranging from 5/32 inches to 15/64 inches; however, 3/16 inches is a preferable option.
- We recommend the former because it is less prone to wandering. If you use a smooth bit, make a dimple for it to stand in so that the bit is secure in place while drilling; for this task, a hammer and center punch will do.
- Put a 2-inch wooden block under where you poke a hole in a belt to prevent the drill from scratching the underneath surface. Ensure to hold the belt and block securely as they can move along with the drill.
- Keep drilling until the bit goes through the leather completely.
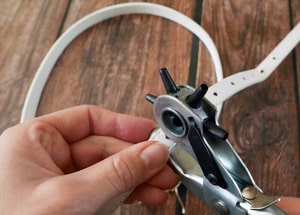
2. A rotary punch
- Normally, belt holes are made with a #5 punch, but you can choose other sizes that match your needs.
- Place your belt between 2 parts of the plier and squeeze the handle. Due to the leather thickness, you need to grasp the tool firmly. Turn the belt slightly to create a neat hole.
- To craft an oval or elongated shape, put an extra hole in a belt next to the old one as long as you have 2 round corners. Use a knife to eliminate the middle part. In case the leather pieces are still in the holes, you can get rid of them with a toothpick.
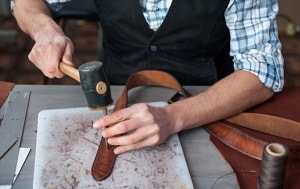
3. An awl/nail and hammer/mallet
- Place a wooden block under the belt; you don’t want other surfaces affected by strong strokes.
- Pick an awl, a nail, or even a sharp screwdriver having the same size as the original holes. However, if the available holes are large, we’d suggest skipping this method.
- Use a mallet to pierce the awl/nail into the belt with short strokes until you get an appropriate hole. Some Reddit users use a hammer as a mallet substitute.
- Then, pick up a compact pocket knife to scrape out the leather within the hole to make it round if needed.
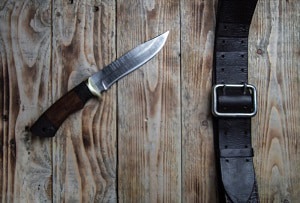
4. A pocket knife
Be careful if you make another hole in a belt with a knife. Its blade may be too large for belt holes. Grab a small pocket knife, and pierce the leather with it at the determined mark. Spin the blade to create a rounded edge hole.
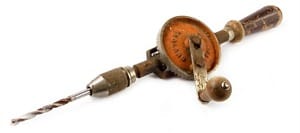
5. A hand drill
- Place the belt on a wooden base. Note that you need to secure them with clamps to keep them in place while working.
- Position your desired drill bit on the belt and rotate the drill handle to make the hole.
- Pull the drill with light force to get rid of any leather residue.
6. Plier and a heated nail
- We’d recommend selecting a nail ranging from 5 to 5 inches in length or a gauge of 4-8 to put holes in belts.
- Spread the belt on the wood or secure one end of the belt with your foot and hold the other with your hand.
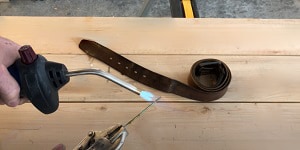
- Hold the nail firmly with a plier, then burn it with a torch or on a stove.
- When the nail is hot enough to prick leather, put it right at the marked spot. Rotate the nail several times to have a clean and round hole. You can repeat the process if the nail isn’t through the belt yet.
7. Round drive punch
- A round drive punch allows you to add holes to belts as long as you pick the correct size, which is preferably 3/16 inches or any size similar to factory holes.
- After choosing the proper diameter, you can follow the same process as using a hammer and nail to create perfect holes.
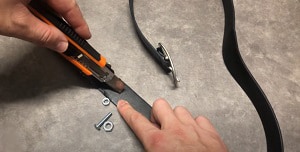
8. Razor blade, screw, nuts, and hammer
- Cut a tiny hole in the belt with a razor blade.
- Prepare a large nut that fits your screw, plus a smaller nut. Place the small one right under the cut spot, the nut will create a short distance from the belt to the working surface. You can replace this nut with a piler.
- Place the big screw on the belt, then tap a hammer on it repeatedly until it can penetrate the leather.
- Swap this small nut for the larger one. Continue to use short strokes to let the screw go through the nut.
- Take off the nut. You will likely see some leather pieces around the screw, so use a razor knife to remove them and then pull the screw out.
Step 3: Seal the hole
You can wear the leather belt now. However, we’d highly recommend applying a leather polisher to the inside holes to seal them.
Conclusion
Learning how to make a hole in a leather belt is possible in a wink. With tool such as a pocket knife, a nail, a hammer, and more, you can adjust the waistband of your pants quickly. This process not only helps you save money but also retains the belt’s appearance.
We hope you will succeed with the instructions. In case you are still stuck at any steps, be sure to leave some words here, and we’ll help you.
Read more:

This is Edward Manning, the editor in chief of Construction Informer. Quite a bit of my time is spent researching the market and interviewing experts in the field so that I can give you reliable information.


