
Leather belts themselves are beautiful. However, you can apply a method to make them more charming, which is to make a tooled leather belt. You will have an accessory with unique patterns that add an accent to your outfit.
Through carving leather belts activities, you can practice your meticulousness, transform leather tooling ideas into real things and create handmade gifts.
Learning how to tool a leather belt can be quite challenging for beginners, but this comprehensive guide will erase your concerns. Now, let’s jump into the core section.
Step-by-step to Tool a Leather Belt
What to prepare
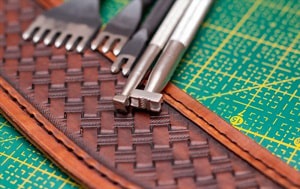
- DIY leather tooling tools:
- A leather beveler
- A stamp
- A swivel knife
- A stylus
- A modeling spoon
- A veiner
- Transparent tracing or waxing paper
- A cutting board
- Leather
- A rubber mat
- A ruler
- Masking tape
- Water
- A sprayer or cloths
- A zip-lock bag
- Hammer
- Leather sealer
- Leather finish product
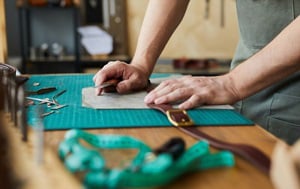
Step 1: Clean up the working zone.

Carving requires high attention, so you should put away unnecessary items to keep the work area neat. If you work on a table, ensure its legs are sturdy enough to withstand strokes.
Also, prepare a cutting board made from marble or granite with a smooth and non-textured surface, so it won’t leave any mark on your belt.
You should stick a rubber mat to the underside of the board to keep the board stable and reduce the noise while working.
Step 2: Determine the location of patterns.
In this tooling leather tutorial, you should mark 7 inches from one end of the belt.
Measure the border on the belt. If you basket stamp a leather belt, the border is around 1⁄4 inch from the belt edges. However, you can choose any size fitting your strap.
Line the border with a swivel knife. Your wrist and elbow should be kept in place while you use your arm to create straight lines along the belt. Your design should be within those borders.
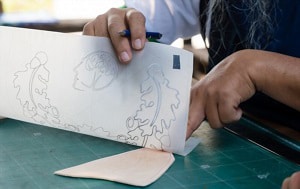
Step 3: Print patterns.

Adhere some masking tape to the back of your leather belt to protect it from stretching out while tooling. Remove the excess tape with your hands or a knife.
Then, print tooled leather belt designs on transparent normal paper, tracing, or wax paper. Never draw patterns on carbon paper, since carbonic dust can stain your hands.
Another way is to make a tap-off piece that is reusable.
1. Draw any pattern on the tracing material.
2. Cut a small piece of leather as long as it can fit the belt.
3. Spray a little water onto the leather, put the tracing paper on it, and start to trace the design gently with a stylus.
4. After that, mark out the leather with a swivel knife. Ensure your cuts are uniform and deep enough so that the tap-off tool can leave obvious outlines on your belt.
5. Speed up the drying process of leather to open up lines. Next, coat it with a leather sealer to add a water-resistant layer and extend its life when exposing it to the damp belt.
Step 4: Transfer the design onto the belt.
If you skip step 3, you can draw easy leather tooling patterns directly on the leather belt.
- For those choosing tracing paper, dampen the belt moderately with a water sprayer or a damp cloth. To ensure the belt is soaked evenly, put it in a ziplock bag for 30 minutes or 1 hour.
- Take the belt out of the bag, if you find it dry, re-moisturize it with a little water or a casing solution according to the product’s instructions.
- Place the prepared design on the leather and draw over its lines with a pencil or stylus. In case you use the tap-off piece, place it face down on the belt, and tap short strokes with a hammer to transfer the artwork temporarily.
Step 5: Tooling the lines

Before starting to cut out the main lines on the belt, remember to sharpen the swivel knife by running it 2 times on a polishing compound.
- To make perfect leather tooling belts, you should hold the swivel knife correctly. Place your index finger in the curved saddle. The barrel of the knife will be held by your thumb and middle fingers to maneuver it easily and maintain a constant pressure for all cuts.
- Your wrist won’t move, and your fingers will control the blade’s corner to cut lines into the leather. Pull the blade towards you so that you can change the belt’s directions simply. The proper depth for the knife to cut through is around ⅓ – ½ of the leather thickness.
- To engrave round shapes, you shouldn’t turn the blade too much at an angle, which will result in the cut being loose. Instead of that, hold the blade straight up and down to have smooth curves.
- Re-carve all lines with the blade to have more apparent traces on the leather.
Step 6: Bevel the lines.
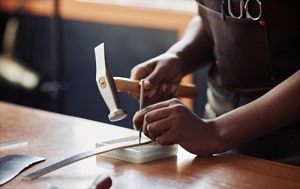
Once the main lines are created, you will decide which side of the lines you want to raise or lower to make the artwork more appealing.
You can re-dampen your belt if needed before beveling the border lines with a hammer and beveler.
Use a modeling spoon or beveler to engrave or pitch for details. Note that you should work on one side of the pattern instead of 2 sides. The design will become more obvious with constant taps.
Step 7: Stamp the carves
To maintain stamped marks, you can re-dampen the leather.
A stamp will add shadow and texture to the artwork or even make a background. Keep the stamp straight and tap 1 or 2 times on it. In case you use larger stamps, you need to tap it 1 or 2 more times until the imprint becomes clearer.
Then, use the veiner in the direction you want to create a mirroring effect around the swirl sections.
You can add some short ornament cuts for leaves, plants, and flowers with the swivel knife.
Step 8: Seal the carves.
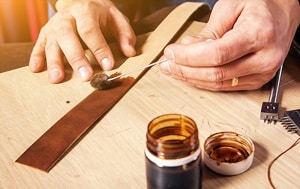
Once the hand tooled leather belt patterns are complete, we’d suggest using leather dye to paint some sections, such as the details or the background. To protect your hands from chemical substances, you should wear gloves before proceeding.
- You can pour a little leather finish product onto a towel, old sponge or wool dauber, then wipe it along the belt. Otherwise, you can dilute acrylic paint with water to brush the designs.
- Take a little antique paste, rub it to the belt entirely, and let it sit for 10-15 minutes. Then, wipe off the excess paste with paper towels until it is removed completely.
- Spray a leather coating solution on a sponge and apply it to the belt to prevent exterior factors from damaging the antique layer.
- Lastly, choose a waterproof spray to cover the whole belt, maintaining the antique’s shine.
Other tips you can refer to:
Frequently Asked Questions

What should I use to cut a leather belt?
You can use different tools to make custom belts, including a rotary cutter, strap cutter, draw gauge, round knife, or scissors. A rotary cutter is the most common device for cutting a leather strap with a thickness of less than 8-9 ounces.
How can I tool leather at home?
Tooling leather at home is fairly similar to the above process. However, you should bear in mind some notes to have a perfect artwork.
- Don’t choose leather having these signs: brands, bites, or scars affecting the carving process. We’d recommend picking veg-tanned leather, allowing you to stamp, bevel, and tool your template well.
- You should select leather with 3-4 ounces in thickness to avoid cutting through it.
- The large leather can be warped after carving, and you can flatten it by adding a little weight to the whole piece. Once it is dried, smoothen the edges with a canvas cloth or paper towel.
Conclusion
Having leather tooling belts is always a desire of people who love handcrafted products, and learning how to tool a leather belt will make your dream come true. You can select any design you want and trace it onto your waist strap little by little.
Once your products are done, be confident to share them with us. We would like to see your results. Good luck with your tooling process.

This is Edward Manning, the editor in chief of Construction Informer. Quite a bit of my time is spent researching the market and interviewing experts in the field so that I can give you reliable information.