
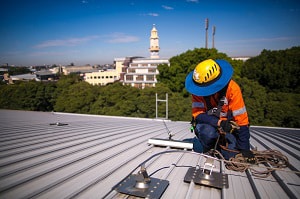
There are around 37 casualties due to falling injuries from high distances per year in the US. Thereby, ensuring your safety when working at heights, such as working on a roof, should be your priority.
Fortunately, we always have solutions for these risks using personal protective equipment, and roof harnesses are a common option with convenient and friendly-budget features.
However, choosing the right steep roof safety equipment may not be enough if you don’t understand how to use a roof safety harness correctly to utilize its functions. We are here to help you. Let’s check a detailed guide to secure yourself on a roof now.
Table of Contents
- Step-by-step to Use a Roof Safety Harness
- What to prepare:
- Step 1: Inspect the roof safety harness kit
- Step 2: Safely climb a steep roof
- Step 3: Consider fall space
- Step 4: Install roofing harness anchor points
- Step 5: Set up the slide guard
- Step 6: Put the harness on
- Step 7: Attach to the fall protection system
- Step 8: Keep a short distance from the anchor point
- Personal Fall Arrest Systems Vs. Fall Restraint: What’s the Difference?
- At What Height Safety Equipment is Required?
- Conclusion
Step-by-step to Use a Roof Safety Harness
What to prepare:
- Ladder
- Anchor point
- Full-body safety harness for roof workers
- Lifeline
- Lanyard
- Rope grab
- 2×6 or 2×4 boards
All of you know the importance of a safety harness, especially if you are painters, roofers, or those who work on over 10 feet heights. This comprehensive instruction will provide detailed steps to work on a roof safely.
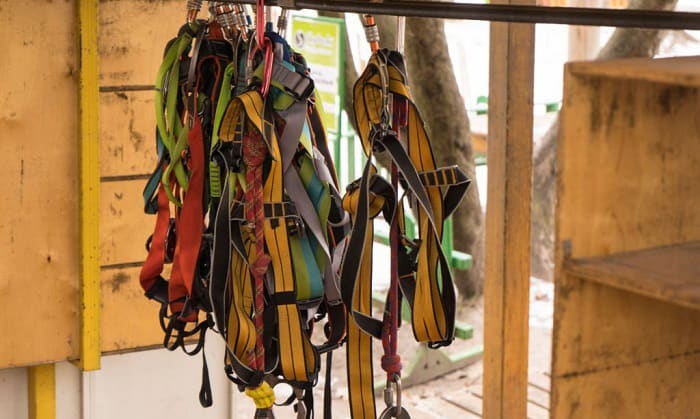
Step 1: Inspect the roof safety harness kit
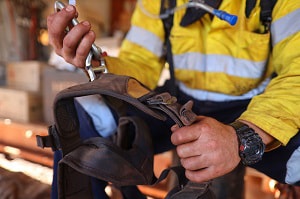
You should inspect the harness for working on roof carefully before using it. The checklist includes webbing, D-rings, buckles, straps and rope, a tag system, and plastic loops.
Ensure these components meet the security standards to provide you with thorough protection. If you find any damaged sign, you can get manufacturers to check and re-send it as even a small fault can result in severe outcomes.
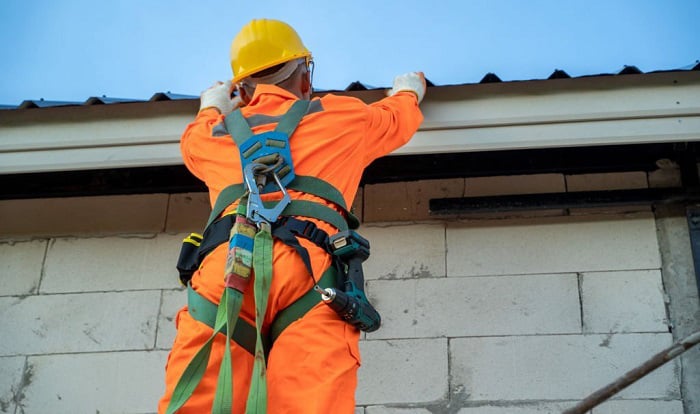
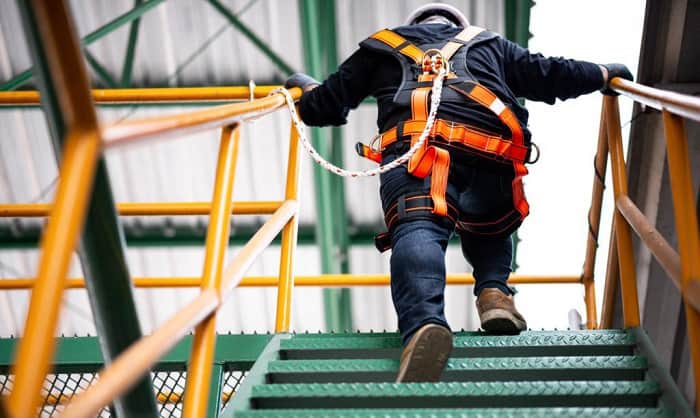
Step 2: Safely climb a steep roof
Using a ladder will help you get on roof easily.
The ladder needs to be positioned on an even surface. For rough ground, you can level the ladder by placing a plywood block under its foot, then tie off to keep it in place.
While climbing, don’t carry any tools for easy movement, and use two hands to maintain your balance.
Once you get to the top, you should attach the ladder to the roof with a 20D nail to keep from sliding off a roof.
Step 3: Consider fall space
Note that you need to check the fall distance between you and the next bottom surfaces such as the ground or lower roof, to ensure you won’t hit either of them when falling.
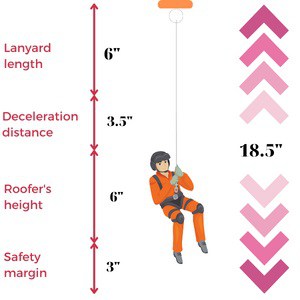
The total fall clearance to prevent you from potential injuries is around 18.5 feet, including the below factors. That said, if the fall distance is less than 18.5 feet, you should reduce the roof safety rope length. It should be highlighted that you never reduce the safety gap at all costs.
- Lanyard length: 6 feet
- Deceleration distance: 3.5 feet
- Roofer’s height: around 6 feet
- Safety margin: 3 feet
Another way to calculate fall distance is to multiply your height by 3 times.
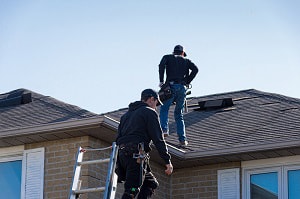
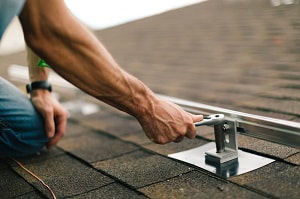
Step 4: Install roofing harness anchor points
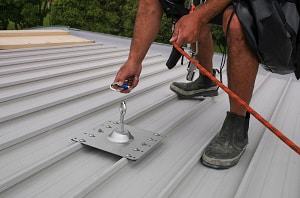
Once the clearance is determined, it’s time to insert roof harness anchor points. You can select 3 kinds of anchors: temporary anchors, permanent anchors, and standing seam.
- Check where the most rigid area on the roof is by tapping a hammer on it and hearing the sound to attach anchors instead of choosing guardrails, trusses, and others. Many experts advise attaching anchor points near the ridge and the roof’s eave with a gap between them of at least 6 feet.
- Each type requires different tools to install like a driller, nail, or screw. You can find detailed steps in the manufacturers’ instructions.
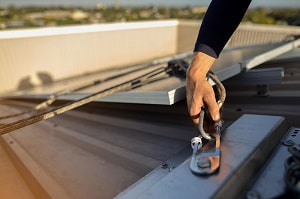
- Check its security by tugging anchors strongly. To fill up the holes after removing anchors, you can use cement.
Step 5: Set up the slide guard
Aside from step 4, we will give you another way to answer the question “how to not fall off a roof” which is set up with safety roof climbing gear. These components help you safely work on roof and act as barriers for storing tools.
- Although the frame of trusses and rafters are dissimilar, they will have a nailing part with 1- 1/2 inches in thickness. You can find tough wood on the roof with a hammer.
- You need to glide the pry bar’s blade and flip it up a little to install the roof brackets, which leave approximately 18 inches from the rim, 4 inches apart from each other and let the shingle shield the nails.
- If you insert screws into improper positions, you can add cement to close them and drill a nail apart from the old hole over 1 inch and keep doing your tasks.
- Add 2×6 or 2×4 boards to create a DIY roof harness slide guard. Once done, you can move the board to work on other areas and utilize these homemade boards multiple times.
Step 6: Put the harness on

- Put the safety harness on your shoulder like the way you wear a jacket or suspenders. Then, fasten the leg straps and chest straps as well.
- Ensure the equipment can embrace your body snugly and comfortably. If the straps are too tight, they can prevent your circulation flow properly, and the loose straps cannot hold you well when you fall from heights.
Each fall protection system fits a specific body shape. Hence, we’d recommend purchasing one for yourself and you shouldn’t share it with others.
Step 7: Attach to the fall protection system
The appropriate method to connect your harness to the fall protection system depends on its type: SRL pr PFAS:
- SRL: Connect one end SRL system to the anchor point and the other to the dorsal D-ring at your back.
- PFAS: Attach the self-retracting lifeline to the anchor. Based on the length of rope and harness for roofing you want, you can add a few rope grabs when needed. These ropes are in charge of keeping you in place around at ⅝ – 5/16 inch ropes.
Add a lanyard and rope grabs to the lifeline. The other end of the lanyard will be hooked on the dorsal D-ring.
- To have more robust security, you can use roofing rope with a lanyard and 2- side snap hooks.
Step 8: Keep a short distance from the anchor point
The anchor points can’t promote their thorough functions if you stay away from them too far. The ideal interval between you and the anchor point should be within 4 feet, bigger distances cannot ensure your safety.
If you want to move to other areas, you can move the anchor points or attach more anchors to the roof. Once you move around, you need to adjust the location of the rope grab to avoid any slack.
Watch this video: The roof safety harness can only promote its function when you know how to use it correctly.
Personal Fall Arrest Systems Vs. Fall Restraint: What’s the Difference?
1. Components
- PFAS consists of a self-retracting lifeline or belt, a safety lanyard, and a harness.
- A fall restraint provides an anchor point and any PPE, such as a safety harness.
2. Purposes:
- PFAS will reduce the fall speed when you fall or slip so that you can land securely without hitting the ground. This system allows you to work in hazardous areas such as roof edges.
- A fall restraint will limit your reach to dangerous zones. The equipment is suitable for roofers stay on the roof for a long time, especially those who work on a spacious rooftop. You cannot move to high-risk places like roof edges, skylights, etc.
3. Numbers of users:
- PFAS is used for only 1 worker
- Fall arrest enables a few people to use it at the same time.
At What Height Safety Equipment is Required?
In case you work on a gently-sloping roof whose ratio between vertical and horizontal run is 4:12 or less with a 6-feet distance from the ground, you can use a roof harness like PFAS or other safety systems like a warning line and guardrail.
For roofers who work on an extremely-slope roof with a 6 feet height or over off the land, you need to use PFAS. Depending on your local regulations, the height required can be different.
If you live in Canada, wearing PFAS when you work on 3 meters or over is a mandatory requirement.
Conclusion
You certainly can gain a lot of knowledge of how to use a roof safety harness properly to protect yourself and your colleagues. You should choose a cool and cloudy day for roofing tasks.
Besides, you can take note of these roof safety tips, including wearing clean shoes with rubber soles and not placing ropes and cords underneath your feet to prevent slipping accidents.
If you have any concerns about using Werner roofing safety system or any of the harness sytems, don’t be shy to share them with us, we are always willing to help you.

This is Edward Manning, the editor in chief of Construction Informer. Quite a bit of my time is spent researching the market and interviewing experts in the field so that I can give you reliable information.